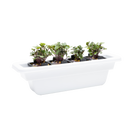
A hydroponic herb pesto recipe is exactly what it sounds like: a classic blended herb sauce made entirely from fresh herbs you've grown in a soil-free, water-based indoor garden system. Instead of buying a plastic clamshell of wilting basil from the grocery store, you walk three feet to your countertop garden, snip what you need, and have a vibrant, restaurant-quality sauce ready in under ten minutes. If you've been growing herbs indoors and wondering what to actually do with all that lush greenery, this guide is your answer.
Why Hydroponically Grown Herbs Make Better Pesto
The quality of your pesto starts long before you open the blender. Hydroponic herbs — meaning plants grown in a nutrient-rich water solution rather than soil — are consistently shown to be more flavorful, more aromatic, and more nutritious than their conventionally farmed counterparts.
A study published by researchers at the University of Florida found that hydroponically grown basil produced up to 20% higher essential oil content compared to soil-grown basil under the same light conditions. Essential oils are exactly what give basil that punchy, almost peppery aroma that makes a great pesto sing. More oil means more flavor, and more flavor means you need less of everything else to get a great result.
There's also the freshness factor. Commercial basil travels an average of 1,500 miles before it reaches a grocery store, and herb flavor degrades rapidly after harvest. When you snip basil from a Personal Garden sitting on your kitchen counter, there is zero lag time between harvest and plate. You are working with the freshest possible ingredient, and it shows in every bite.
Hydroponically grown herbs also tend to be cleaner. No soil splatter on the leaves, no grit to rinse out, and no pesticide residue to worry about — especially when you're growing in a controlled indoor environment and managing your own nutrients.
What You'll Need: The Homegrown Basil Pesto Ingredient List
This recipe is a traditional Genovese-style homegrown basil pesto with one upgrade: you can easily customize it with other herbs from your indoor garden. The base recipe uses:
- 2 cups fresh basil leaves (packed), freshly harvested
- ½ cup extra-virgin olive oil
- ⅓ cup pine nuts (toasted lightly in a dry pan)
- 3 cloves garlic
- ½ cup freshly grated Parmigiano-Reggiano
- Salt and black pepper to taste
- 1 teaspoon fresh lemon juice (optional, but brightens the flavor)
Optional herb additions from your indoor garden:
- ¼ cup fresh flat-leaf parsley (adds a grassy, mild backbone)
- 2 tablespoons fresh mint leaves (adds a cool, slightly sweet note)
- 1 tablespoon fresh thyme leaves (earthy and aromatic)
One of the greatest advantages of growing an indoor garden is having all of these herbs available simultaneously, regardless of the season. A full-size system like The Rise Garden 3 gives you enough growing capacity to keep basil, parsley, mint, and thyme all going at once — so you're never waiting on a single ingredient to make this sauce.
How to Make Hydroponic Herb Pesto: Step-by-Step Instructions
Making this fresh herb blender sauce takes about 8 minutes from harvest to jar. Here's the process:
- Harvest your basil. Snip stems just above a leaf node to encourage bushier regrowth. You want about 2 tightly packed cups of leaves. Remove any tough stems — you only want the leaves and the very tender top portions of the stems.
- Toast your pine nuts. Add pine nuts to a dry skillet over medium heat and stir constantly for 2–3 minutes until they turn light golden. Watch them closely — they go from golden to burned fast. Let them cool for a couple of minutes before adding to the blender.
- Add garlic first. Drop the garlic cloves into your food processor or blender and pulse 4–5 times until roughly minced. This prevents large chunks in your finished sauce.
- Add pine nuts and pulse. Add the cooled pine nuts and pulse another 5–6 times until you get a coarse, sandy texture.
- Add the basil. Pack the basil leaves in and pulse 6–8 times. Don't over-process — you want texture, not a smooth paste at this stage.
- Stream in the olive oil. With the processor running on low, slowly drizzle in the olive oil. This emulsification step is what gives pesto its glossy, cohesive texture.
- Add the cheese. Add the Parmigiano-Reggiano and pulse 3–4 more times to incorporate. Season with salt, pepper, and lemon juice.
- Taste and adjust. More garlic? More salt? A splash more oil? This is your sauce — make it yours.
Yield: Approximately 1 cup of pesto. Serves 4 as a pasta sauce.
Storage: Press plastic wrap directly onto the surface of the pesto before refrigerating to prevent oxidation (the surface darkening is harmless but unappealing). Keeps refrigerated for up to 5 days, or freeze in ice cube trays for up to 3 months.
Can You Make Pesto With Other Hydroponic Herbs?
Absolutely — and this is where indoor garden herb sauce gets really exciting. Traditional Genovese pesto is a basil sauce, but the formula (fresh herb + nut + hard cheese + oil + allium) is endlessly adaptable. Here are four variations worth trying once your indoor garden is in full production:
Arugula Pesto: Swap the basil for 2 cups of hydroponically grown arugula. The result is a peppery, slightly bitter sauce that pairs beautifully with grilled steak or roasted vegetables. Use walnuts instead of pine nuts for an earthier flavor.
Cilantro-Lime Pesto: Replace basil with 1½ cups cilantro and ½ cup flat-leaf parsley. Add the juice of one lime and swap the Parmigiano for cotija cheese. Outstanding as a topping for fish tacos or grain bowls.
Mint and Walnut Pesto: Use 1 cup basil and 1 cup mint. Replace pine nuts with toasted walnuts and add a pinch of red pepper flakes. This one works especially well stirred into Greek yogurt as a dip, or tossed with lamb.
Herb Stem Pesto: Don't discard basil or parsley stems — they're packed with flavor. Blend 1 cup of stems with ½ cup olive oil, 2 garlic cloves, and a squeeze of lemon for a looser, more intensely flavored drizzling oil that's perfect over soups and grain salads.
The USDA's FoodData Central database confirms that fresh basil contains over 60 identified phytochemicals, including linalool and eugenol — the compounds responsible for its signature flavor complexity. Growing your herbs hydroponically and using them immediately after harvest ensures those compounds are at peak concentration when they hit your blender.
How Does Growing Herbs Hydroponically Change the Harvest Schedule?
This is one of the most common questions new indoor gardeners ask, and the answer is genuinely exciting. Hydroponic systems deliver water, oxygen, and nutrients directly to plant roots in a highly efficient way, which dramatically accelerates growth compared to soil gardening.
NASA's Veggie Project — which has been studying plant growth in controlled, soil-free environments since 2014 — found that plants grown hydroponically can mature 30 to 50 percent faster than soil-grown counterparts under equivalent light conditions. For basil specifically, most hydroponic growers see harvestable leaves in as little as 3 to 4 weeks from seed, compared to 6 to 8 weeks in soil.
What this means practically for your pesto habit: once you start a new round of basil seed pods, you're about a month away from your first serious harvest. And because hydroponic basil grows so vigorously, regular harvesting actually encourages the plant to branch out and produce even more leaves. The more pesto you make, the more leaves your plant produces. It's a genuinely satisfying cycle.
A well-maintained hydroponic basil plant can produce continuous harvests for 3 to 5 months before it bolts (goes to seed) and flavor quality declines. Staggering your plantings — starting a new pod every 6 to 8 weeks — means you'll never be without fresh basil. For households that make pesto regularly, a larger growing system like The Rise Loft offers the capacity and the furniture-grade design to make that kind of continuous production both practical and beautiful in your living space.
Tips for Getting the Most Basil From Your Indoor Garden
Growing great basil for pesto is about more than just planting and waiting. A few key practices make the difference between a scraggly plant and a dense, productive herb machine.
Harvest from the top down. Always cut from the top of the plant, removing the top two sets of leaves. This forces the plant to redirect energy into side shoots, creating a wider, bushier growth pattern. Never harvest more than one-third of the plant at once.
Pinch flowers immediately. As soon as you see flower buds forming, pinch them off. Once a basil plant flowers, it shifts its energy from leaf production to seed production, and leaf flavor deteriorates quickly. Staying on top of this extends your harvest window by weeks.
Monitor your EC and pH. EC (electrical conductivity) measures the concentration of dissolved nutrients in your water solution — the higher the EC, the more nutrients are present. For basil, an EC between 1.6 and 2.2 mS/cm is ideal. pH should stay between 5.5 and 6.5 for optimal nutrient uptake. Rise Gardens systems are designed to make this monitoring straightforward, even for first-time growers.
Give it enough light. Basil is a high-light crop. It wants 14 to 16 hours of light per day for peak leaf production. Rise Gardens grow lights are calibrated to deliver the right spectrum and intensity for exactly this kind of herb growth.
Keep temperatures stable. Basil is sensitive to cold. Temperatures below 50°F (10°C) cause leaf blackening and flavor loss. Indoor hydroponic growing naturally solves this problem — your kitchen maintains the warm, stable temperatures basil loves year-round.
Frequently Asked Questions
Can I use any type of basil for hydroponic pesto?
Yes — Genovese basil is the traditional choice for pesto because of its large leaves and sweet, slightly spicy flavor profile, but Thai basil, lemon basil, and purple basil all work well and produce interesting flavor variations. Genovese remains the best starting point if you want the most classic result, and it's one of the most reliably productive varieties in hydroponic systems.
How do I keep my homemade pesto from turning brown?
Basil pesto browns due to oxidation — the same process that turns cut apples brown. The best prevention is to press a layer of plastic wrap directly onto the surface of the pesto before refrigerating, eliminating air contact. Adding a thin film of olive oil over the top before sealing also helps. A teaspoon of lemon juice in the recipe slows oxidation as well.
What is the difference between hydroponic basil and soil-grown basil for cooking?
Hydroponically grown basil tends to have higher essential oil concentrations, which translates directly to more intense aroma and flavor. It also tends to be cleaner (no soil residue), more uniform in leaf size, and available year-round regardless of outdoor growing seasons. For a flavor-forward preparation like pesto where basil is the star ingredient, the quality difference is noticeable.
How much basil do I need to grow to make pesto regularly?
A single mature hydroponic basil plant can yield approximately 1 to 2 cups of harvestable leaves per week once fully established. Since one batch of pesto requires 2 packed cups of basil, you'll want at least 2 to 3 active plants at different stages of growth to maintain a consistent weekly supply. Staggering your seed pod starts by 3 to 4 weeks ensures you always have plants in peak production.