A hydroponic kale chips recipe starts long before you preheat the oven — it starts the moment you drop a seed pod into your indoor garden and watch those dark, crinkled leaves unfurl under your grow lights. Hydroponic kale chips are crispy, oven-baked snacks made from kale grown without soil, using a nutrient-rich water system that delivers minerals directly to the roots. The result? Leaves that are consistently tender, vibrant, and packed with flavor — often more so than store-bought bunches that traveled hundreds of miles before landing on a shelf. If you have a countertop or floor-standing hydroponic garden at home, you already have everything you need to make one of the best crispy kale snack recipes you've ever tasted.
Why Homegrown Hydroponic Kale Makes Better Chips
The quality of your kale chips depends almost entirely on the quality of your kale leaves, and hydroponic growing has a measurable advantage here. Research published by the USDA Agricultural Research Service has found that leafy greens harvested within hours of consumption retain significantly more water-soluble vitamins — including vitamin C and folate — than produce stored and shipped over several days. When you grow kale in a Rise Gardens hydroponic system, you're harvesting leaves at peak freshness and nutritional density, which translates directly into chips with better flavor and crunch.
Hydroponic systems control three variables that field-grown kale cannot: water pH, electrical conductivity (EC), and light exposure. pH refers to the acidity of the nutrient solution — kale thrives between 5.5 and 6.5 on the pH scale. EC (electrical conductivity) measures the concentration of dissolved minerals in the water; for kale, a target EC of 1.6–2.4 mS/cm encourages leafy growth without bitterness. Balanced nutrients — nitrogen, phosphorus, potassium, and micronutrients — keep leaves lush and mild-tasting, which is exactly what you want in a baked kale chip.
According to the NASA Veggie Project, which has been growing leafy greens in controlled environments since 2014, crops raised in optimized hydroponic conditions can produce yields up to 10 times greater per square foot than traditional soil farming. For home growers, that means a consistent, generous supply of kale leaves ready to turn into snacks whenever a craving hits.
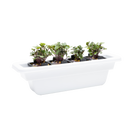
If you're just getting started, the Personal Garden is a compact countertop hydroponic garden that grows up to 12 pods at once — more than enough to keep your kitchen stocked with fresh kale year-round.
What You Need: Ingredients and Equipment
This baked kale chips indoor garden recipe is intentionally simple. The goal is to let the fresh, homegrown flavor of your kale do the work. Here's what you'll need:
Ingredients
- 1 large bunch of fresh hydroponic kale (about 6–8 cups of loosely packed leaves, stems removed)
- 1.5 tablespoons extra-virgin olive oil
- ½ teaspoon fine sea salt
- Optional flavor additions: nutritional yeast (2 tbsp for a cheesy flavor), smoked paprika (¼ tsp), garlic powder (¼ tsp), red pepper flakes, or lemon zest
Equipment
- Large baking sheet (two if available)
- Parchment paper
- Large mixing bowl
- Salad spinner or clean kitchen towel
- Oven
That's genuinely all you need. The salad spinner is worth calling out specifically — moisture is the enemy of crispy kale chips. Any residual water on the leaves when they go into the oven will steam them instead of crisping them, leaving you with a chewy, wilted result instead of the light, crunchy snack you're after.
Step-by-Step Hydroponic Kale Chips Recipe
Follow these steps carefully and you'll have perfectly crispy chips every single time. Small details — like massaging the oil and using low, slow heat — make a significant difference in the final texture.
Step 1: Harvest Your Kale
Use clean scissors or garden shears to harvest outer leaves from your hydroponic kale plants, leaving the central growth tip intact so the plant continues producing. Aim for leaves that are fully sized but not yellowing. Younger, smaller leaves tend to crisp up faster and more evenly, which makes them ideal for this recipe.
Step 2: Wash and Dry Thoroughly
Rinse your kale leaves under cool water, then spin them completely dry in a salad spinner. Spread them on a clean towel and pat away any remaining moisture. This step is non-negotiable for a truly crispy kale snack recipe.
Step 3: Tear Into Chip-Sized Pieces
Remove the tough central stems by folding each leaf in half lengthwise and pulling the stem away. Tear the leaf into pieces roughly the size of a playing card — they'll shrink by about 50% in the oven, so don't go too small.
Step 4: Season
Place the torn leaves in a large mixing bowl. Drizzle olive oil over the leaves and use your hands to massage the oil into every surface. This isn't just mixing — you're physically breaking down some of the leaf's cell structure to help it crisp more evenly. Add your salt and any optional seasonings, then toss again.
Step 5: Arrange and Bake
Preheat your oven to 300°F (149°C). Spread the kale in a single layer on parchment-lined baking sheets, making sure leaves don't overlap. Overcrowding is the most common mistake home cooks make — it traps steam and prevents crisping. Use two baking sheets if needed.
Bake for 20–25 minutes, rotating the pans halfway through. The chips are done when they're crisp and the edges are just beginning to turn light brown. Watch them closely in the final five minutes; hydroponic kale leaves are often thinner and more delicate than field-grown varieties, and they can go from perfect to burnt quickly.
Step 6: Cool Before Eating
Remove the pans from the oven and let the chips cool on the baking sheet for 5 minutes before eating. They'll continue to crisp as they cool. Once fully cooled, store in an airtight container at room temperature for up to 2–3 days — though they rarely last that long.
How Do You Grow Kale Hydroponically at Home?
Growing kale hydroponically is straightforward, even for first-time gardeners. Kale is one of the most forgiving crops you can grow indoors — it tolerates minor fluctuations in nutrient levels, grows relatively quickly, and doesn't require pollination the way fruiting plants do.
In a Rise Gardens system, you start by placing kale seed pods into your garden's grow deck. The seed pods are pre-seeded and designed to work directly with Rise Gardens' water delivery system, so there's no transplanting, no soil, and no mess. Germination typically occurs within 5–10 days, and your first harvest-ready leaves usually appear in 3–5 weeks, depending on variety and light conditions.
Kale grows vigorously under the full-spectrum LED grow lights used in Rise Gardens systems, which are calibrated to deliver the correct intensity and color spectrum for leafy greens. The The Rise Garden 3 is a full-size indoor hydroponic garden system with three growing tiers, giving you the capacity to grow kale alongside herbs, lettuces, and other greens simultaneously — enough variety to keep your kitchen stocked all year.
To support healthy leaf development, keep your nutrient solution replenished with Rise Gardens nutrients, which are formulated specifically for hydroponic crops. Kale is a heavy feeder, especially of nitrogen, so consistent nutrient top-offs are key to producing the large, flavorful leaves that make the best chips.
A study from Cornell University's Controlled Environment Agriculture program found that hydroponic leafy greens grown under optimized LED lighting and nutrient conditions reached harvestable size 25–30% faster than the same crops grown in greenhouse soil — a meaningful advantage when you're trying to keep up a regular supply of fresh kale for snacking.
Is Hydroponic Kale as Nutritious as Soil-Grown Kale?
This is one of the most common questions home hydroponic growers ask, and the answer is reassuring: yes, hydroponic kale is nutritionally comparable to — and in some cases superior to — soil-grown kale. The key is that hydroponic systems provide nutrients in their ionic form, which means plants absorb them directly without relying on soil microbiology to convert organic matter first. The plant gets exactly what it needs, when it needs it.
Kale is already one of the most nutrient-dense vegetables available. According to the USDA FoodData Central database, one cup (67g) of raw kale provides 684% of the Daily Value for vitamin K, 206% of vitamin A, and 134% of vitamin C. While baking does reduce some heat-sensitive nutrients like vitamin C (by approximately 15–25% at low oven temperatures), the overall nutritional profile of homegrown hydroponic kale chips remains impressively strong compared to most packaged snack foods.
What hydroponics genuinely improves is consistency. Without soil variability, pest pressure, or weather fluctuations, your kale grows to a predictable standard every single cycle. That consistency is one reason hydroponic kale chips taste so reliably good — you're not working around tough, bitter leaves from a stressed plant.
For households that want a larger growing footprint with design that fits naturally into living spaces, The Rise Loft is a premium indoor garden with furniture-grade design, offering an elegant way to grow kale and other greens as part of your home's aesthetic rather than in spite of it.
Flavor Variations for Your Crispy Kale Snack Recipe
Once you've nailed the basic technique, the flavor variations are nearly endless. Here are five combinations that work especially well with homegrown kale chips:
- Classic Sea Salt: Keep it simple with olive oil and flaky sea salt. This is the best way to taste your kale's natural flavor profile.
- Cheesy Nutritional Yeast: Toss with 2 tablespoons of nutritional yeast, ½ tsp garlic powder, and a pinch of turmeric for a golden, savory coating that mimics cheddar without any dairy.
- Smoky Paprika: Add ½ tsp smoked paprika and ¼ tsp cumin along with your salt for a BBQ-adjacent flavor that's unexpectedly addictive.
- Lemon Pepper: Finish with fresh lemon zest and cracked black pepper after baking. The citrus aroma is especially bright with freshly harvested homegrown kale.
- Spicy Sriracha: Thin 1 tsp of sriracha with the olive oil before massaging it into the leaves. The heat mellows in the oven, leaving a warm, lingering spice.
All of these variations follow the same baking method — low temperature, single layer, thorough drying. The only variable is what you add to the bowl before the oven.
Frequently Asked Questions
How long does hydroponic kale take to grow before I can harvest it for chips?
In a Rise Gardens hydroponic system, kale typically germinates within 5–10 days of planting. You can begin harvesting outer leaves for chips in approximately 3–5 weeks. Continuous-harvest practices — taking outer leaves while leaving the central growing tip — allow the same plant to produce for several months.
Why are my homegrown kale chips chewy instead of crispy?
Chewy kale chips are almost always caused by one of three things: leaves that weren't dried thoroughly before baking, too much oil applied to the leaves, or overcrowded baking sheets that trap steam. Make sure leaves are completely dry before seasoning, use no more than 1.5 tablespoons of oil per large bunch, and give every leaf its own space on the pan.
Can I use a dehydrator instead of an oven for this kale chips recipe?
Yes — a food dehydrator works beautifully for kale chips and produces a very consistent, evenly dried result. Set your dehydrator to 125°F (52°C) and dry for 2–4 hours, checking periodically. Dehydrated kale chips also tend to stay crispy longer in storage than oven-baked versions because more moisture is removed in the process.
What is the best kale variety to grow hydroponically for chips?
Curly kale (the classic green variety) is the most popular choice for chips because its ruffled surface area crisps evenly and holds seasonings well. Lacinato kale (also called dinosaur or Tuscan kale) produces flatter, sturdier leaves that work well if you prefer a slightly chewier chip with more structure. Both varieties thrive in Rise Gardens hydroponic systems under the same nutrient and lighting conditions.