A hydroponic herb compound butter roasted prime rib is exactly what it sounds like: a bone-in standing rib roast — one of the most prized cuts of beef you can serve — coated in a hand-mixed compound butter built entirely from fresh herbs grown in your own indoor hydroponic garden. Compound butter is simply softened butter blended with aromatics and herbs, then chilled and sliced or spread directly onto meat before roasting. When those herbs come from a living hydroponic system rather than a plastic clamshell from the grocery store, the flavor is measurably brighter, the aroma more complex, and the whole experience more satisfying. This fresh herb roasted standing rib roast is the kind of dish that earns a permanent spot in your holiday rotation — and growing the herbs yourself makes it genuinely yours.
Why Homegrown Hydroponic Herbs Make a Better Compound Butter
Flavor in fresh herbs comes primarily from volatile aromatic compounds — terpenes, terpenoids, and phenolics like rosmarinic acid in rosemary and thymol in thyme. These compounds begin to degrade the moment a plant is harvested. According to post-harvest research from the University of California Cooperative Extension, fresh-cut herbs can lose up to 30% of their volatile aromatic compounds within 24 hours of harvest at room temperature. By the time store-bought herbs travel from a commercial farm, through a distribution center, and onto a grocery shelf, days or even weeks may have passed since cutting.
When you grow herbs in an indoor hydroponic garden and harvest them the morning you make your compound butter, you are capturing those aromatics at their absolute peak. Hydroponics — a method of growing plants in a nutrient-rich water solution rather than soil — also gives you precise control over the plant's environment. You control the light spectrum, the water pH (ideally 5.5–6.5 for most herbs), and the nutrient concentration (measured in electrical conductivity, or EC). That control translates directly into consistent, robust flavor in every leaf.
A 2021 study published in the journal Agronomy found that hydroponically grown basil contained 20–40% higher concentrations of key aromatic compounds compared to soil-grown counterparts under identical harvest conditions. While basil is not the star of a prime rib butter, the same principle applies to rosemary, thyme, and chives — the herbs at the heart of this homegrown herb holiday roast.
Which Herbs to Grow for Your Indoor Garden Prime Rib Recipe
Not every herb belongs on a prime rib. The fat content and bold beefy flavor of a standing rib roast call for herbs with enough presence to stand up to both. Here are the four you want growing in your indoor garden before the holidays arrive:
- Rosemary — The anchor of any prime rib herb crust. Its piney, resinous flavor penetrates the fat cap during roasting and perfumes the entire oven. Rosemary thrives in hydroponics at a pH of 5.5–6.0 and moderate EC (1.0–1.6 mS/cm).
- Thyme — Earthy and slightly floral, thyme adds depth without overpowering. It pairs naturally with garlic and lemon zest in the butter base.
- Flat-leaf parsley — Fresh parsley brightens the butter and keeps the herb blend from becoming too heavy. It also provides visual appeal in the finished crust.
- Chives — Mild onion flavor that rounds out the shallot notes. Chives are among the fastest-growing herbs in a hydroponic system, often ready to harvest in as little as 3 weeks from transplant.
You can start all four using seed pods designed specifically for Rise Gardens systems. Each pod contains a pre-seeded growing medium calibrated for hydroponic germination, so you are not guessing on spacing or depth. Plant 6–8 weeks before your intended roast date to ensure a full, harvestable plant at peak flavor.
What Equipment and Ingredients Do You Need?
Before you start, gather everything in advance. Prime rib is an investment — USDA Choice bone-in rib roasts average $17–$25 per pound at retail — and preparation is where most home cooks lose control of the outcome. Having your tools and ingredients ready eliminates the variables.
For the Roast
- 1 bone-in standing rib roast, 3 bones (approximately 7–8 lbs), USDA Choice or Prime grade
- Kosher salt (Diamond Crystal preferred for even curing)
- Coarse black pepper
- Butcher's twine
- Instant-read or leave-in probe thermometer — non-negotiable for food safety and doneness accuracy
- Roasting pan with a rack
For the Hydroponic Herb Compound Butter
- 1 cup (2 sticks / 227g) unsalted European-style butter, softened to room temperature
- 3 tablespoons fresh rosemary, finely minced (from your hydroponic garden)
- 2 tablespoons fresh thyme leaves, stripped from stems
- 2 tablespoons fresh flat-leaf parsley, finely chopped
- 1 tablespoon fresh chives, minced
- 6 cloves garlic, pressed or finely grated
- 1 tablespoon Dijon mustard
- 1 teaspoon lemon zest
- 1½ teaspoons kosher salt
- ½ teaspoon white pepper
How to Make Hydroponic Herb Compound Butter Roasted Prime Rib Step by Step
Step 1: Dry Brine the Roast (24–72 Hours Before)
Remove the roast from packaging, pat completely dry with paper towels, and season generously on all surfaces with kosher salt — approximately ½ teaspoon per pound. Place uncovered on a wire rack set over a sheet pan and refrigerate for a minimum of 24 hours, up to 72 hours. The USDA recommends refrigerating raw beef at 40°F (4°C) or below throughout this process. Dry brining draws surface moisture out, which then dissolves the salt and is reabsorbed. The result is deeply seasoned meat with a drier exterior that browns faster and more evenly during roasting.
Step 2: Build the Compound Butter
Harvest your herbs the morning of the roast. Rinse under cold water, spin dry, and mince finely. Combine softened butter, all minced herbs, garlic, Dijon, lemon zest, salt, and white pepper in a bowl. Mix vigorously with a fork or rubber spatula until fully incorporated and uniform in color. Taste and adjust salt. The butter should be intensely herbed — it will mellow significantly on the hot roast. Roll into a log in plastic wrap and refrigerate for 30 minutes to firm slightly, making it easier to apply.
Step 3: Prepare and Coat the Roast
Remove the roast from the refrigerator 2 hours before roasting to take the chill off the center — this promotes even cooking. Tie the roast between the bones with butcher's twine to hold its shape. Apply approximately two-thirds of the compound butter over the entire surface of the roast, pressing it into any crevices near the bones. Reserve the remaining butter to serve alongside at the table or to baste the sliced meat.
Step 4: Roast
Preheat your oven to 450°F (232°C). Place the roast bone-side down on the rack in the roasting pan. Roast at 450°F for 20 minutes to develop a deep brown crust, then reduce heat to 325°F (163°C) and continue roasting until your probe thermometer reads your target internal temperature. Per USDA Food Safety guidelines, whole muscle beef roasts are safe at an internal temperature of 145°F (63°C) followed by a 3-minute rest. For medium-rare, pull the roast at 125–128°F and allow carryover cooking during the rest period to bring it to approximately 130–132°F. A 7–8 lb roast will take approximately 2 to 2.5 hours total at 325°F after the initial sear.
Step 5: Rest and Carve
Transfer the roast to a carving board, tent loosely with foil, and rest for a minimum of 20–30 minutes. Do not skip this step. Resting allows the muscle fibers to relax and the internal juices to redistribute throughout the meat. Cut away the twine, slice between the bones for bone-in portions, or remove the bones as a rack and carve into individual rib-eye steaks approximately 1 inch thick.
How to Set Up Your Indoor Garden to Have Fresh Herbs Ready by the Holidays
Timing is everything. If you are planning this roast for late November or December, you need your herb garden running no later than mid-October. That gives your rosemary, thyme, parsley, and chives 6–8 weeks to reach a mature, harvestable state.
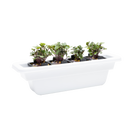
A Personal Garden is an excellent starting point if counter space is your limiting factor. It holds up to 12 plant pods, which is more than enough to grow all four herb varieties simultaneously with pods to spare for salads or other cooking projects. The compact footprint fits on a kitchen counter or island without dominating the space, and the integrated LED grow light is tuned to the spectrum ranges (primarily 400–500nm blue and 620–700nm red wavelengths) that drive vegetative growth in leafy herbs.
If you want to scale up — growing herbs year-round and expanding into lettuces, microgreens, and vegetables — The Rise Garden 3 gives you a full three-tier growing system capable of supporting dozens of plants in your home. And for those who want their indoor garden to function as a design element in a dining room or living space, The Rise Loft is a furniture-grade hardwood garden stand with a premium aesthetic that looks intentional next to a holiday table setting.
Feed your herb plants consistently with the correct nutrients throughout the grow cycle. Herbs in a hydroponic system rely entirely on the nutrient solution for their mineral intake — there is no soil buffer. A balanced formula with appropriate nitrogen, phosphorus, and potassium ratios, along with micronutrients like calcium, magnesium, and iron, keeps foliage green, aromatic, and productive through multiple harvests.
NASA's Veggie project, which has been developing space-based hydroponic food production since 2014, identified consistent lighting schedules and stable nutrient delivery as the two most critical variables for reliable leafy herb production — findings that apply directly to your home garden setup.
Serving, Pairing, and Making the Most of Leftover Herb Butter
A well-executed fresh herb roasted standing rib roast is one of the most complete dishes you can put on a holiday table, but a few thoughtful additions elevate the entire meal. Classic accompaniments include Yorkshire pudding (using the pan drippings), creamy horseradish sauce, and roasted root vegetables — all of which benefit from the reserved compound butter.
Leftover compound butter stores beautifully. Wrapped tightly in plastic wrap and placed in an airtight container, it keeps in the refrigerator for up to 2 weeks or in the freezer for up to 3 months. Use it on roasted potatoes, grilled fish, pasta, or spread thickly onto crusty bread served alongside the carved roast. A single batch from this recipe yields enough to coat the roast generously with a full third remaining for table service.
For wine pairing, a standing rib roast's rich, beefy flavor and herb-forward crust call for red wines with enough tannin structure to cut through the fat — a Napa Valley Cabernet Sauvignon, a Bordeaux blend, or a Barossa Valley Shiraz all work exceptionally well.
Frequently Asked Questions
Can I make the hydroponic herb compound butter ahead of time?
Yes — compound butter is one of the best make-ahead components in this recipe. You can prepare the herb butter up to 5 days in advance and store it wrapped tightly in plastic wrap in the refrigerator, or freeze it for up to 3 months. Pull it from the fridge about 30 minutes before you plan to apply it to the roast so it softens enough to spread easily without tearing the surface of the meat.
How long does it take to grow enough herbs for this recipe in a hydroponic garden?
Most culinary herbs reach a harvestable size in a hydroponic system within 4–8 weeks from seeding, depending on the variety. Chives and parsley tend to be ready on the faster end (4–5 weeks), while rosemary grows more slowly and benefits from a full 6–8 weeks before a significant first harvest. Starting your herb pods 8 weeks before your planned roast date ensures you will have mature, productive plants with enough growth to harvest generously without stressing the plants.
What internal temperature should prime rib reach for food safety?
According to USDA guidelines, whole muscle beef roasts are considered safe to eat at an internal temperature of 145°F (63°C) followed by a minimum 3-minute rest period. Many cooks prefer medium-rare prime rib, which means pulling the roast from the oven at 125–128°F and allowing carryover cooking during a 20–30 minute rest to bring the final internal temperature to approximately 130–135°F. Use a calibrated instant-read or leave-in probe thermometer for accurate readings.
What is the difference between a standing rib roast and prime rib?
The terms are often used interchangeably in home cooking, but there is a technical distinction. A standing rib roast refers to the cut itself — ribs 6 through 12 of the beef chuck, roasted upright on its rib bones. "Prime rib" originally referred to a USDA Prime-graded rib roast, though the term is now commonly used for any bone-in rib roast regardless of USDA grade. For this recipe, a USDA Choice or Prime bone-in rib roast will both produce excellent results, with Prime offering more intramuscular fat marbling and richer flavor.